Main Setup Img to Depth Img to 3D Pano to 3D Viewer
Config Info www Donate Contact
ZoeDepth UX by SubLevel10 Technologies is a User Experience wrapper for isl-org's ZoeDepth. Making it easier for everybody to use the scripts, with easy to use options such as color and model type
Where you have to start. Sets up python and dependecies. View Setup Page for more info.
Where you can make a depthmap image, for use in other programs, from an image
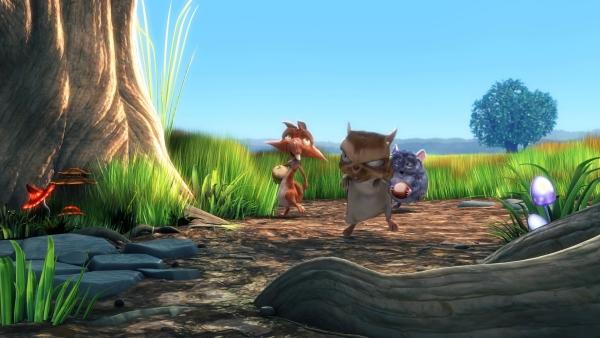
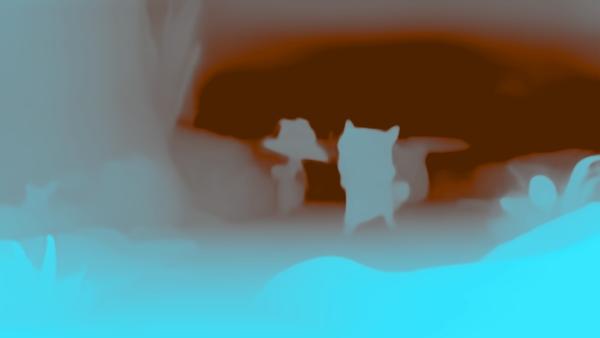
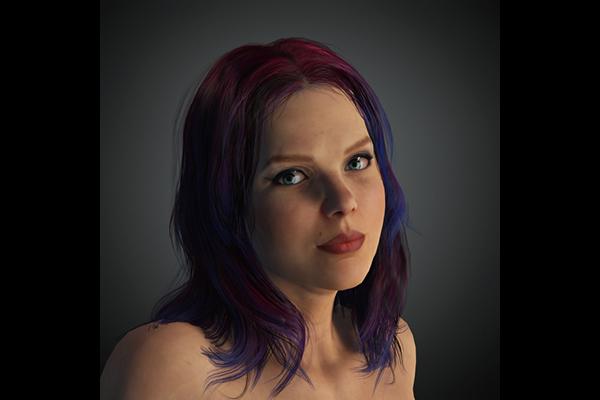
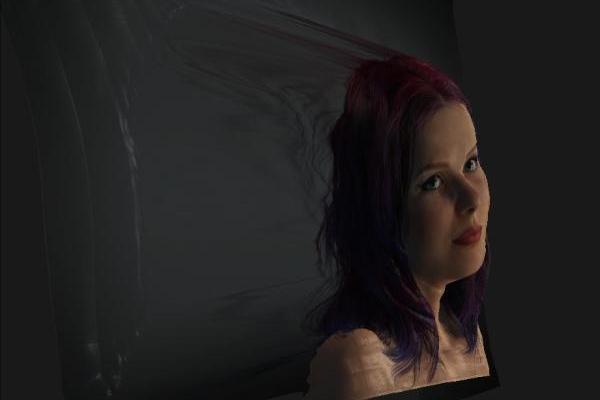
Input Image
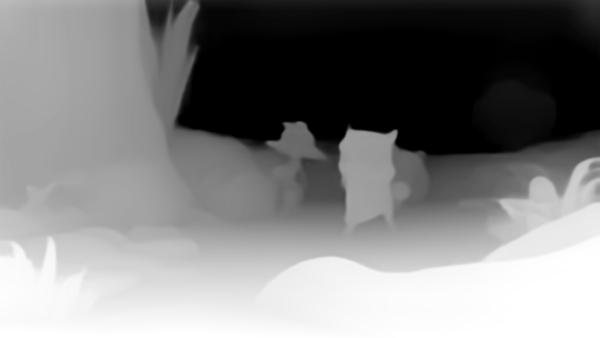
Gray
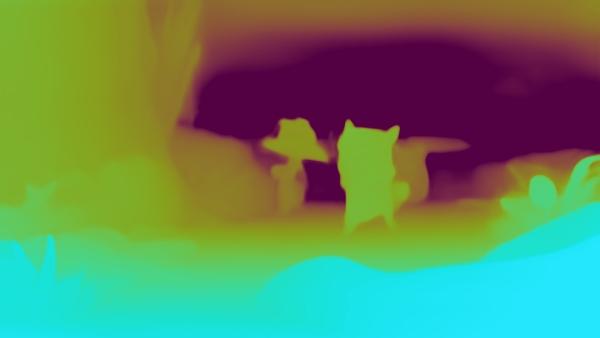
viridis
cividis
plasma
magma
View Img to Depth for more info.
Where you can make a 3d Models fom an image.
Input Image
View Img to 3D for more info.
Where you can make a 3d Models fom an image.
View Pano to 3D for more info.
Here you can view the images and 3d models made in this program. View Viewer for more info.
This software comes with Python 3.10 but still needs to some python packages that make everything work. They will not overwrite or interfere with you computers setup. We made this and all dependencies as self contained as possible
A list of what is required packages that will be downloaded to make everything work
h5py
matplotlib
scipy
timm
torch w/ cuda
torchvision
torchaudio
torchvision
tqdm
wandb
and any other packages that are required by the above list
This Triggers a fresh download of the MiDaS repo for ZoeDepth
It also brings up a pop up screen where you can choose to download additional models.
We require at least ZoeD_N to be downloaded
You can also download and delete any models from the config page 
This checks and makes sure that everything is setup and models can be loaded for ZoeDepth
If you run into any errors during set up, re-check the installed packages or 'reset' and start over.
Choose the type of image you want the depth map to be after processing.
Choices are:
.png
.jpg
.tiff
.webp
.gif (not animated)
.bmp
.pcx
This will open a window where you can browse to the image you would like to make into a depth map. The next time you click on the'Input Image' button, it will start in the same folder that you last choose from. If it doesn't exist anymore, it will start on your desktop. It will show the input image to the left of the 'Make DepthMap' button and 2 new buttons will appear. VIEW and FOLDER
Acceptable input file types are:
.jpg
.jpeg
.png
.tif
.tiff
.gif
.bmp
.webp
.pcx
Any other file types will not show up in the pop up window.
The program will save the output depth map to the same folder as the input image. It adds some numbers to the end of the filename. You can type in a new name or location if you would like to change it.
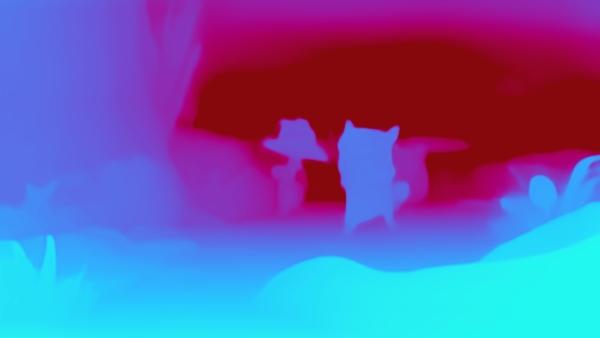
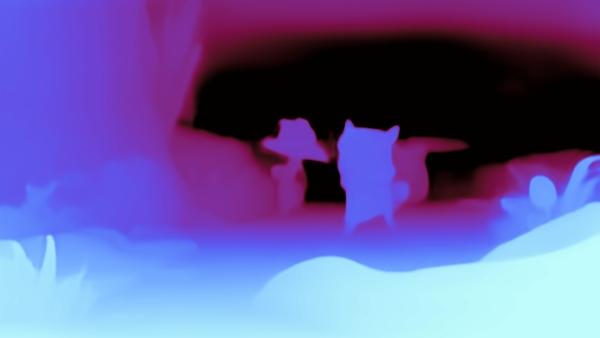
You can choose the output color of the depthmap. Some programs will convert imported depthmaps to greyscale, while others will ONLY accept greys.
cividis
plasma
magma
viridis
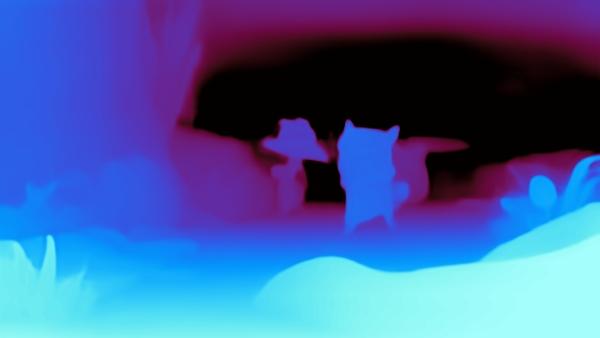
inferno
There are 3 different models to choose from, Each one has a slightly different output.
Zoe_N
Zoe_K
Zoe_NK
Depending on your input image and what you are using the output for, you may like one more than the other. I personally favor Zoe_N for depthmaps and Zoe_NK for 3d models. ZoeD_N is downloaded during set up. You can also download and delete any models from the config page . If you select a model that has not been downloaded, you will be asked before processing if you want to download it or change your selection. ZoeDepth info here.(close to the bottom)
Easy enough to understand. Choose to Overwrite the file if it exists. If set to NOT overwrite, and the file does exist, you will get a warning to change the output file name.
The python scripts and whatnot that make everything work, show the windows command prompt window while working.
You can HIDE it - you won't even know it's there
You can MINIMIZE it - an icon will show up on your taskbar, you can click it to SHOW IT
You can SHOW it - which, well, shows it
Default is the MINIMIZE (you can get to it if you want to, but it's not in your way every time)
This button start the process of making your depthmap. It will check for errors and then do it's thing. A Processing window will appear while creating your depthmap. It will close when it is finished.
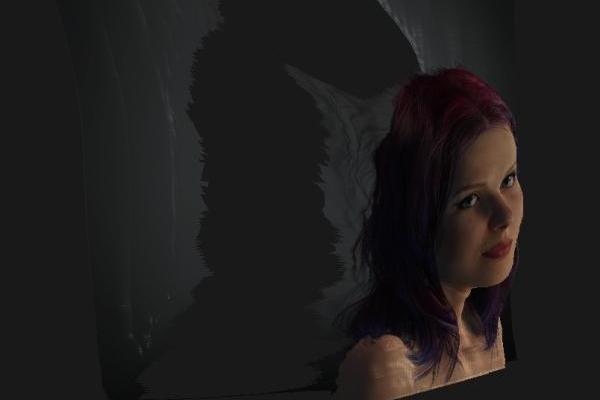
This shows the input image that will be processed. There is also a VIEW button and FOLDER button. The view button will open and show the image. The Defaullt image viewer is the one included with this program. The folder button will open the folder that the image is located in.
This shows the depth map that was last made. There is also a VIEW button and FOLDER button. The view button will open and show the image. The Defaullt image viewer is the one included with this program. The folder button will open the folder that the image is located in.
Here you can choose the 3d output type.
.glb is the native ZoeDepth output
All other are experimental and may not be correct for whichever program you may import them to
.obj is a single file with no external .mtl file for texture. While it is useable in After Effects, It has a much bigger file size than .glb
.stl and
.ply are mostly untested as far as importing into other programs (slicer 2.4 seemed ok with them)
Feel free to play and try em out. Let us know how it goes.
This will open a window where you can browse to the image you would like to make into 3d. The next time you click on the'Input Image' button, it will start in the same folder that you last choose from. If it doesn't exist anymore, it will start on your desktop. It will show the input image to the left of the 'Make 3D Model' button and 2 new buttons will appear. VIEW and FOLDER
Acceptable input file types are:
.jpg
.jpeg
.png
.tif
.tiff
.gif
.bmp
.webp
.pcx
Any other file types will not show up in the pop up window.
The program will save the output 3D model to the same folder as the input image. It adds some numbers to the end of the filename. You can type in a new name or location if you would like to change it.
There are 3 different models to choose from, Each one has a slightly different output.
Zoe_N
Zoe_K
Zoe_NK
Depending on your input image and what you are using the output for, you may like one more than the other. I personally favor Zoe_N for depthmaps and Zoe_NK for 3d models. ZoeD_N is downloaded during set up. You can also download and delete any models from the config page . If you select a model that has not been downloaded, you will be asked before processing if you want to download it or change your selection.
Choose to keep the edges that seperate the different depths or not
Input Image
Easy enough to understand. Choose to Overwrite the file if it exists. If set to NOT overwrite, and the file does exist, you will get a warning to change the output file name.
The python scripts and whatnot that make everything work, show the windows command prompt window while working.
You can HIDE it - you won't even know it's there
You can MINIMIZE it - an icon will show up on your taskbar, you can click it to SHOW IT
You can SHOW it - which, well, shows it
Default is the MINIMIZE (you can get to it if you want to, but it's not in your way every time)
This button start the process of making your 3D Model. It will check for errors and then do it's thing. A Processing window will appear while creating your 3D Model. It will close when it is finished.
This shows the input image that will be processed. There is also a VIEW button and FOLDER button. The view button will open and show the image. The Defaullt image viewer is the one included with this program. The folder button will open the folder that the image is located in.
This shows the 3D model that was last made. There is also a VIEW button and FOLDER button. The view button will open and show the image. The Defaullt image viewer is the one included with this program. The folder button will open the folder that the image is located in.
Here you can choose the 3d output type.
.glb is the native ZoeDepth output
All other are experimental and may not be correct for whichever program you may import them to
.obj is a single file with no external .mtl file for texture. While it is useable in After Effects, It has a much bigger file size than .glb
.stl and
.ply are mostly untested as far as importing into other programs (slicer 2.4 seemed ok with them)
Feel free to play and try em out. Let us know how it goes.
This will open a window where you can browse to the image you would like to make into 3d. The next time you click on the'Input Image' button, it will start in the same folder that you last choose from. If it doesn't exist anymore, it will start on your desktop. It will show the input image to the left of the 'Make 3D Model' button and 2 new buttons will appear. VIEW and FOLDER
Input Images should be full 360 panorama.
The output is a full 3d sphere.
Acceptable input file types are:
.jpg
.jpeg
.png
.tif
.tiff
.gif
.bmp
.webp
.pcx
Any other file types will not show up in the pop up window.
The program will save the output 3D model to the same folder as the input image. It adds some numbers to the end of the filename. You can type in a new name or location if you would like to change it.
There are 3 different models to choose from, Each one has a slightly different output.
Zoe_N
Zoe_K
Zoe_NK
Depending on your input image and what you are using the output for, you may like one more than the other. I personally favor Zoe_N for depthmaps and Zoe_NK for 3d models. ZoeD_N is downloaded during set up. You can also download and delete any models from the config page . If you select a model that has not been downloaded, you will be asked before processing if you want to download it or change your selection.
Easy enough to understand. Choose to Overwrite the file if it exists. If set to NOT overwrite, and the file does exist, you will get a warning to change the output file name.
The python scripts and whatnot that make everything work, show the windows command prompt window while working.
You can HIDE it - you won't even know it's there
You can MINIMIZE it - an icon will show up on your taskbar, you can click it to SHOW IT
You can SHOW it - which, well, shows it
Default is the MINIMIZE (you can get to it if you want to, but it's not in your way every time)
This button start the process of making your 3D Model. It will check for errors and then do it's thing. A Processing window will appear while creating your 3D Model. It will close when it is finished.
This shows the input image that will be processed. There is also a VIEW button and FOLDER button. The view button will open and show the image. The Defaullt image viewer is the one included with this program. The folder button will open the folder that the image is located in.
This shows the 3D model that was last made. There is also a VIEW button and FOLDER button. The view button will open and show the image. The Defaullt image viewer is the one included with this program. The folder button will open the folder that the image is located in.
Select a valid 3d file, and the 'VIEW' button with be enabled. Click it to view the file. The default viewer is one of the included viewers. You can change the default viewer on the Config page.
Acceptable input types for the included viewers are:
.glb
.obj
.stl
.ply
Any other file types will not show up in the pop up window.
If you select 'My Computers Default Viewer' for the default in the config, then ALL file types will be accepted.
Select a valid Image file, and the 'VIEW' button with be enabled. Click it to view the file. The default viewer is one of the included viewers. You can change the default viewer on the Config page.
Acceptable input types for the included viewers are:
.jpg
.jpeg
.png
.tif
.tiff
.gif
.bmp
.webp
.pcx
Any other file types will not show up in the pop up window.
If you select 'My Computers Default Viewer' for the default in the config, then ALL file types will be accepted.
Here you can re-size any image while keeping the aspect ratio (not distorting it)
You can also convert it to another format (.jpg to .png or .gif to .webp ...etc.)
Select a valid Image file that you want to convert or re-size, and the 'VIEW' button with be enabled. Click it to view the file. The default viewer is one of the included viewers. You can change the default viewer on the Config page.
Acceptable input types for the included viewers are:
.jpg
.jpeg
.png
.tif
.tiff
.gif
.bmp
.webp
.pcx
Any other file types will not show up in the pop up window.
The Width and Height of the image will be shown below the input box
From this dropdown you can select either the width or height. In the next box you only input one number for either the width or height, We figure out the other to keep the aspect ratio (no distortion) the same.
After selecting if you are entering the Width or the Height of the new image, enter the new number here. We'll figure out the rest. If you DO NOT want to change the size, just leave it blank or type in the same number as the original.
Select the desired type of file you are creating.
Choices are:
.jpg
.jpeg
.png
.tif
.tiff
.gif
.bmp
.webp
.pcx
This is where the new image will be saved to. You can manually enter something different, but if you change the extension type to one not listed in the dropdown, it may or may not work and you may get undesirable results.
It saves the image to the same directory with some numbers added to it and the new extension.
Tis will satrt the process of making your new image.
When finished, the 'View New Image' button will be enabled.
The program will check to make sure that you are NOT overwriting an older file. If it finds a file with the same name in the folder, It will ask you what to do.
Now you can view your new image.
Click it to view the file. The default viewer is one of the included viewers. You can change the default viewer on the Config page.
Here you can set up your defaults, so everytime you go to a page, you don't have to change the dropdowns and whatnot.
If you only work with .png images, you can set the 'Image Output Type' to .png and you will not have to change it on the other pages every time you use it.
If you don't like our viewers, you can change the viewer type to 'My Computers Default Viewer' and you won't have to see the included one again.
Most options are self explanitory. Here are a few that might need more info.
This pop up window will show you which models are installed
You can also choose to download or delete any of the three models
Reset will reset the dafaults to how they were the first time you used this program
Reset will reset python and its packages to how they were the first time you used this program. You will have to re-setup and download packages again from the 'Set-Up' page
This will compare your programs version number, with the latest one compiled on our site. It will either tell you you are up to date, or it will assk you if you want to download the new version.
Every time you create a new depthmap or 3d model, the program writes a line of code to a debug file. This just shows you the size of the file.
If you contact us with a problem, the contact form asks if you want to send the debug file. While This is very helpfull in trying to figure out why you had a problem.
Resets the debug file and erases ALL history
Some information about SubLevel10 Technologies
This will compare your programs version number, with the latest one compiled on our site. It will either tell you you are up to date, or it will assk you if you want to download the new version.
Visit the ZoeDepth UX portion of our website
Visit SubLevel10 website
Give us a little somethin' somthin' if you enjoy this program
A page for you to contact us without having to go to a website and try to find an actual contact page.
A list Of Licenses, papers, ZoeDepth sites, and others
If you use and like this UX, please donate a little somethin' to help keep all these going.
We currently only take donations through paypal, where no account is neccesary to donate
A copy of all emails and files sent to us wil be stored in the bin/Contact folder
After 20 contacts, the 'Send It' button will be disabled!!! 21 is too many. I don't know you.
*Required
Choices are:
Feedback (be nice, I'm a newbie)
How To Questions
I Gots Issues
Just Sayin' Hey
Here a bug - there a bug - everywhere a bug bug
Something Else ...
Not required, but if you leave it blank, I will probably address you as Susan when I reply
*Required
If you are going to email us, at least let us respond to you
*Required
No point in sending us anything if you have nothing to say
If you want to include any images or whatnot. NO .EXE .BAT .VBS and such will be sent. All files are zipped before sending and scanned before opening.
The debug file is a list of commands sent to python while using this program. It is VERY helpfull to send if you are having issues, but not required to be sent.
Sometimes issues can be as simple as some funny special characters in your folder or file name. The debug file lets us see that, and lets us send the same commands on our system to see the results.
This will check for errors and send us an email with the attached file, if any.
There is a 20 contact limit. After you contact us 20 times, this button will no longer function
21 is too many, I do not know you.
2024 Sub Level 10 Technologies
All Rights Reserved.